How-to guides
Get a thought down in two taps
Synmit opens on a new thought. Write it, tap Synmit, and it lands in Reminders unless you choose somewhere else.
Your first thought
-
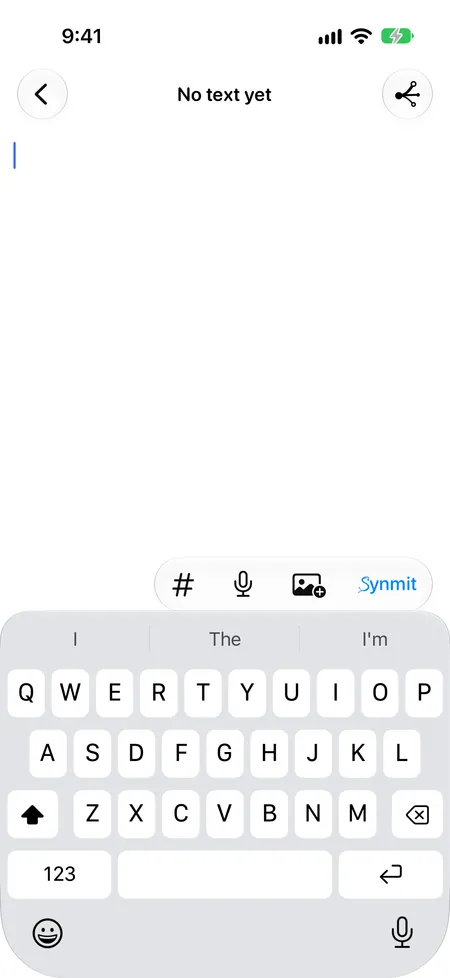
Open Synmit. It opens on a new thought with the keyboard up.
-
Type it, for example
Buy oat milk and bread.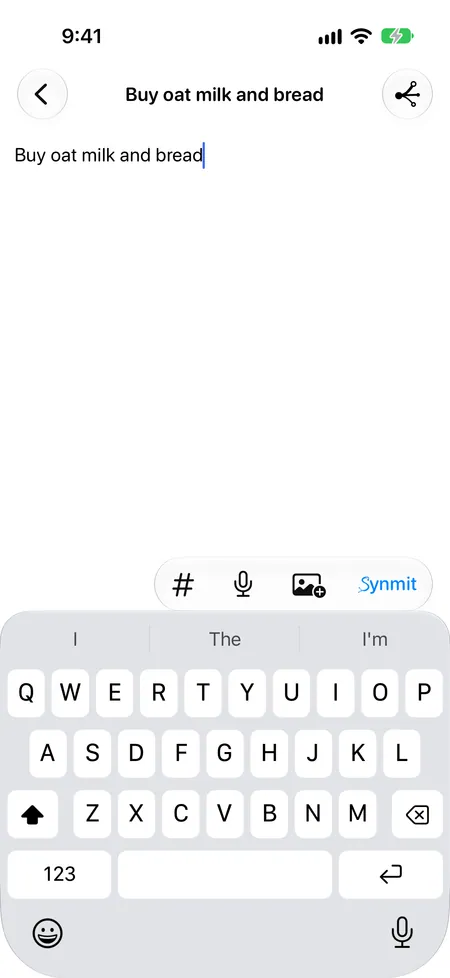
-
Tap Synmit, at the right of the bar above the keyboard.
-
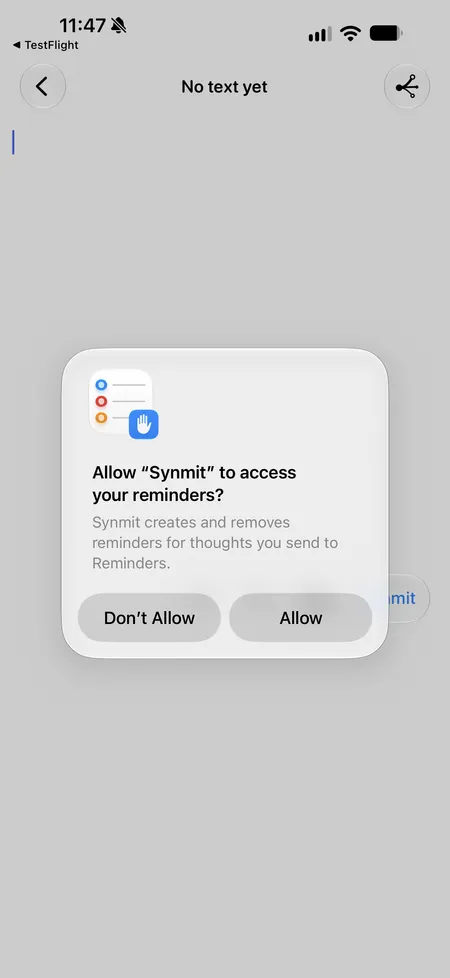
The first time, iOS asks “Allow “Synmit” to access your reminders?” Tap Allow.
-
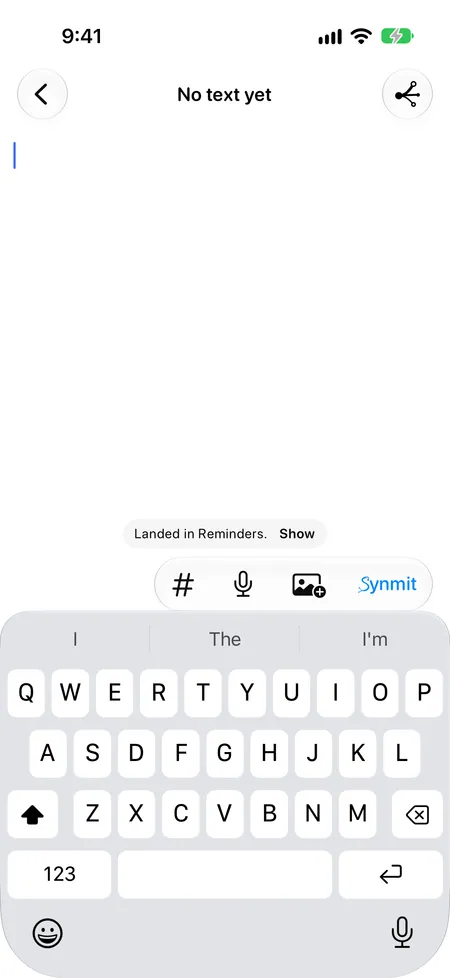
“Landed in Reminders.” appears. Show takes you to it in Sent. Synmit is already on a new thought, ready for the next one.
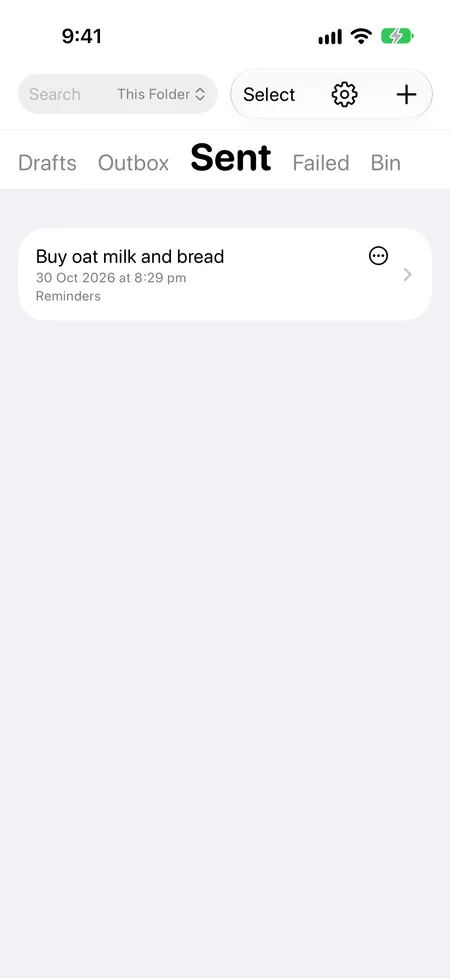


The first time, Synmit adds: “Get it down. Decide later.” Tap Got It.

Two taps from anywhere
New Thought opens Synmit on a new thought. Voice Thought opens it already recording. Put either, or both:
-
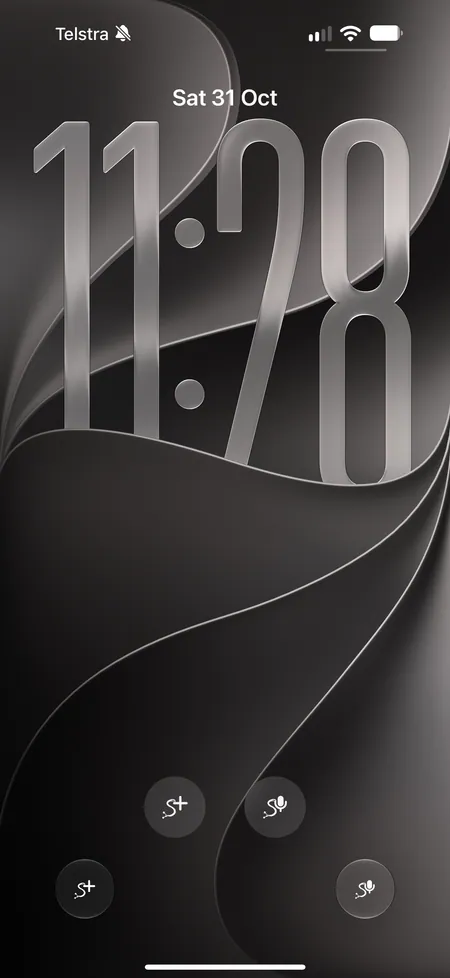
On the Lock Screen: touch and hold the Lock Screen, tap Customise > Lock Screen, tap a control at the bottom, search Synmit and choose one. There are small round widgets of both too.
-
In Control Centre: swipe down from the top right, tap + > Add a Control, search Synmit.

-
On the Action button: Settings > Action Button, swipe to Controls, tap Choose a Control, search Synmit.
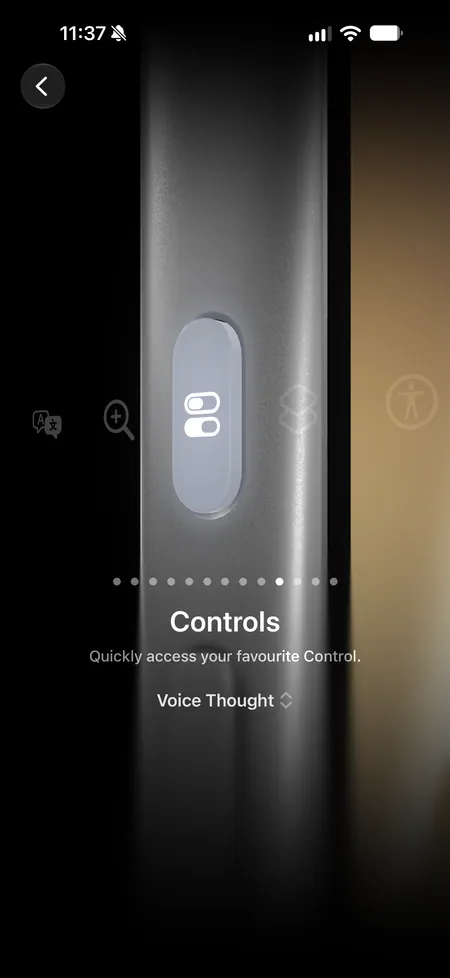
With your iPhone locked, Voice Thought records without unlocking. Press it again to stop, or it stops after a pause. It’s sent as it would be from Synmit, unless you choose Add to Drafts in Synmit Settings > Behaviour > Voice Notes > Voice Thought.
From your Watch
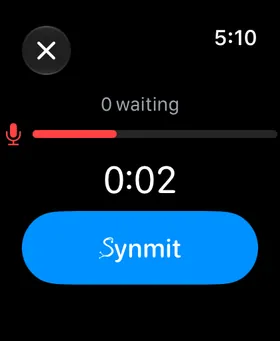
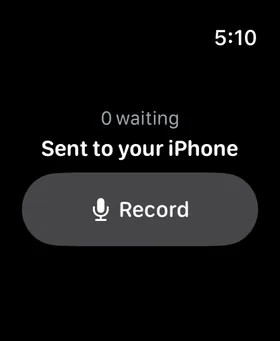
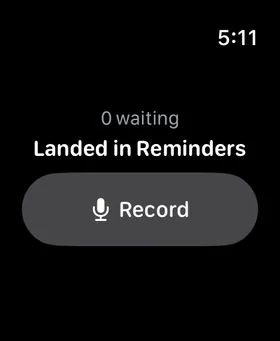
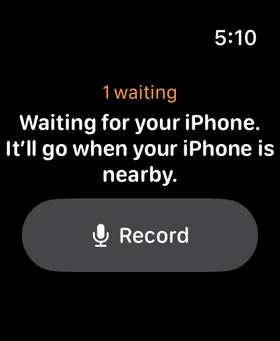
Open Synmit on your Watch and it starts recording. Say your thought and tap Synmit. The Watch says “Sent to your iPhone”, then “Landed in Reminders”. If your iPhone isn’t nearby, it says “Waiting for your iPhone. It’ll go when your iPhone is nearby.”, and the number above it, “1 waiting”, counts what it’s holding.
On your Mac
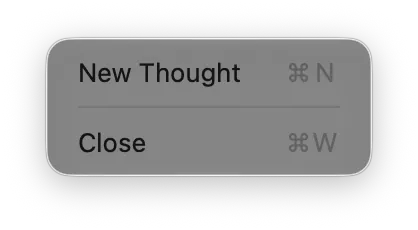
File > New Thought (⌘N), type, then Synmit (⌘Return).
For a thought from any app, record Quick Keys in Synmit Settings > Behaviour: “Record a key and it works in any app while Synmit is running.”

To put New Thought or Voice Thought in your menu bar, open Control Centre, edit its controls, search Synmit and choose one; macOS asks whether to add it to Control Centre or the menu bar.

What Synmit opens on, and what follows a Send
In Synmit Settings > Behaviour: Opening Synmit chooses when a new thought opens, and After a Send chooses what you see next: a new thought, or Where it went, which “shows the thought, highlighted, in the folder it went to.”

Choose where a thought goes
Tap Synmit and your thought goes to the default: Reminders, until you change it.

To send one somewhere else, put a word in it, or choose as you send.
Type a word. Add #notes anywhere in the thought. The word turns blue, and the bar shows #notes beside Synmit. Tap Synmit.

Let the # key suggest it. Tap # on the bar above the keyboard, and it offers your words: #reminder, #calendar, #notes.

Choose as you send. Tap the button at the top right. Synmit to… opens: “Synmit to… chooses where this one goes.” Tap where. As it says, “The Synmit button sends it where a # word in the text says, or to the default.”

Send your first thought to Notes
Synmit sends to Notes through a shortcut called Synmit to Notes, which Synmit adds for you. On iPhone, Synmit can only tell the shortcut is missing once you’ve tried, so your first thought to Notes asks you to add it. It takes a minute, and nothing is lost.
-
Write it and send it. Type your thought with
#notesanywhere in it. The word turns blue. Tap Synmit.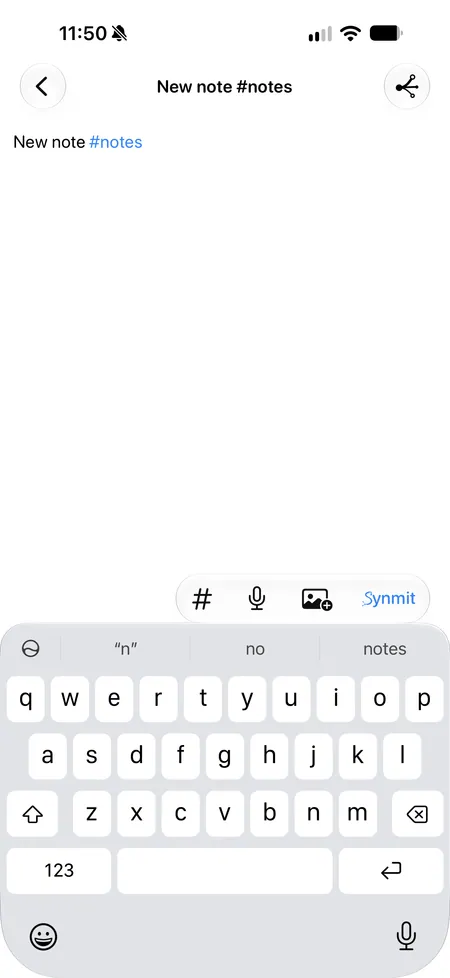
-
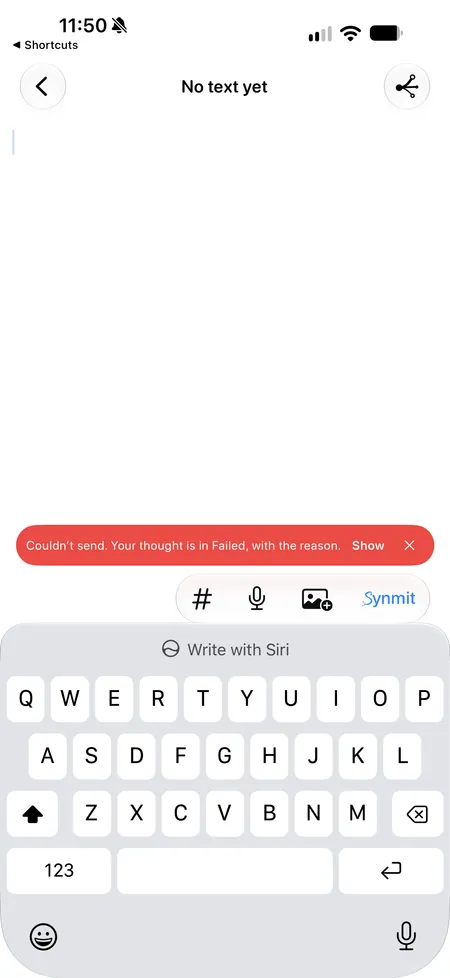
The first time, it can’t send yet. You’ll see “Couldn’t send. Your thought is in Failed, with the reason.” Your thought is kept.
-
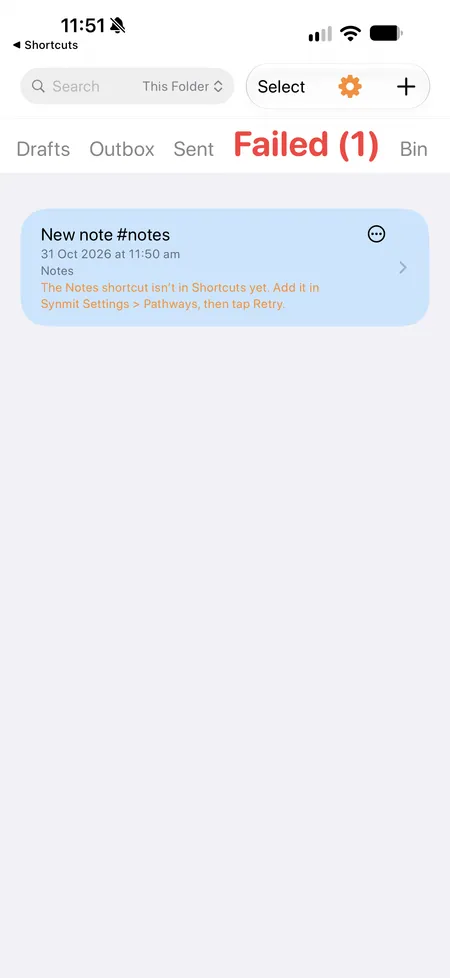
See why. Tap Show. The thought says: “The Notes shortcut isn’t in Shortcuts yet. Add it in Synmit Settings > Pathways, then tap Retry.”
-
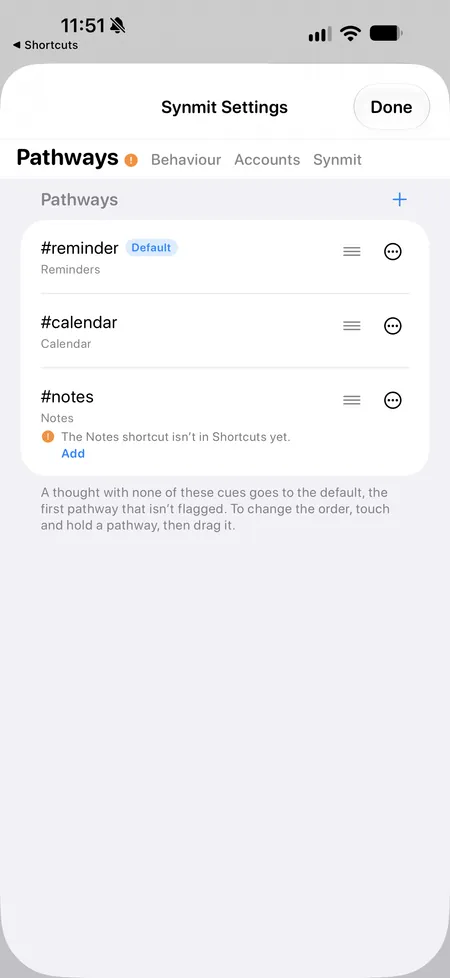
Add the shortcut. Tap the gear, marked in orange, then Pathways. A pathway is a word that sends a thought somewhere. Under #notes it says “The Notes shortcut isn’t in Shortcuts yet.” Tap Add.
-
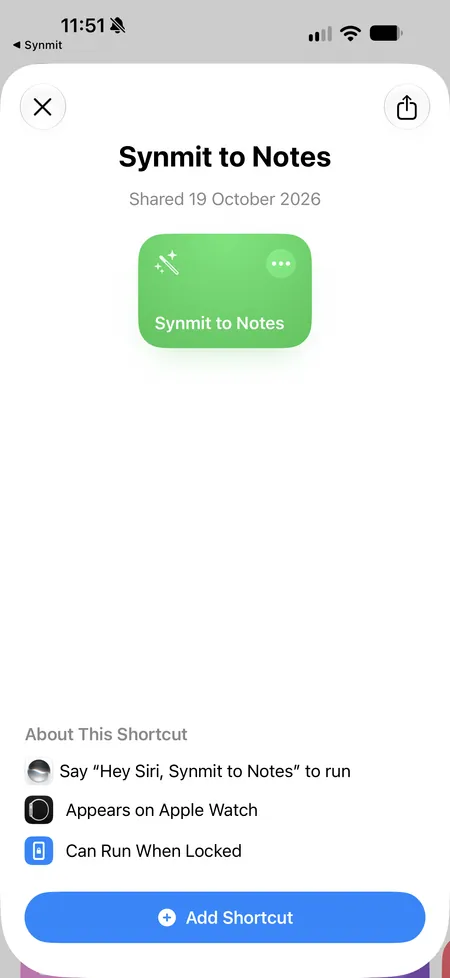
Shortcuts opens on Synmit to Notes. Tap Add Shortcut.
-
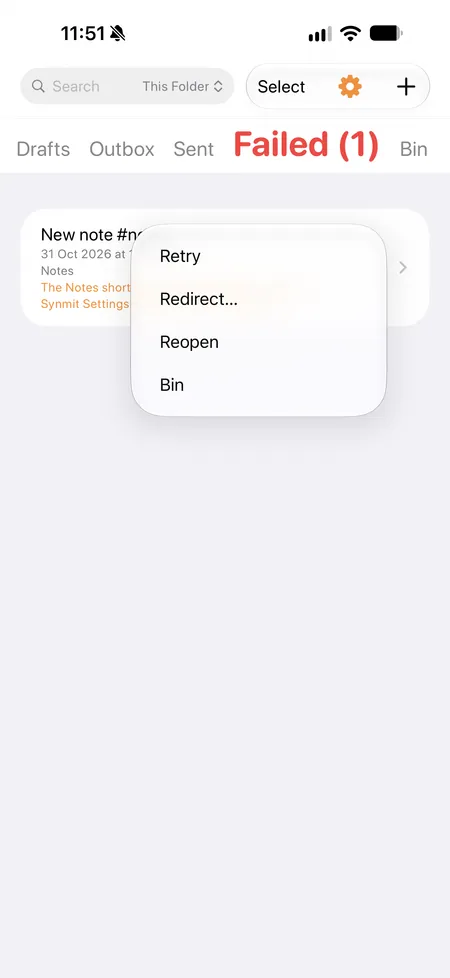
Try again. Back in Synmit, open Failed, tap the thought’s •••, then Retry.
-
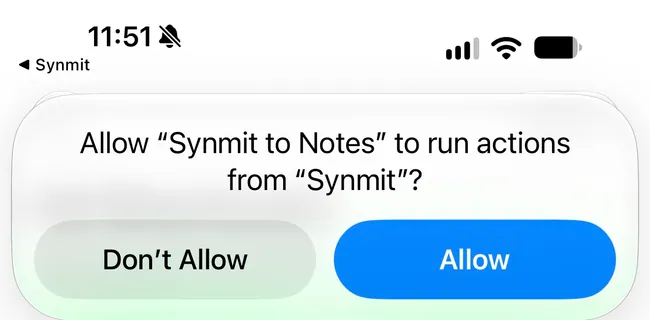
The first time, iOS asks “Allow “Synmit to Notes” to run actions from “Synmit”?” Tap Allow.
-
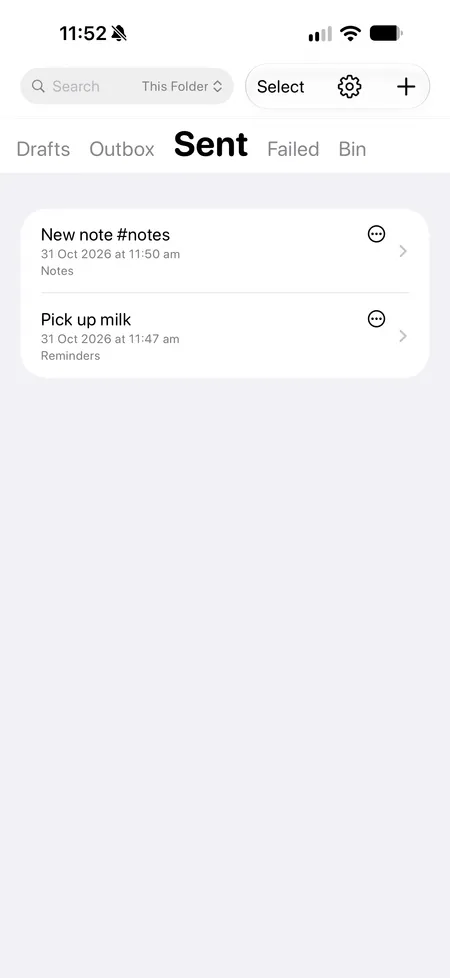
It lands. “Landed in Notes.” appears, and the thought moves to Sent.
From then on, #notes just works.
On a Mac, Pathways shows Add under #notes before you send, so add it first.

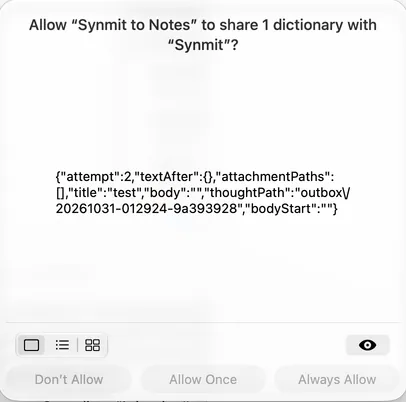
The first time a thought goes to Notes, macOS asks three times whether Synmit to Notes may share with Synmit and save in a note. Choose Always Allow each time, and it won’t ask again. “Landed in Notes.”
Send thoughts somewhere new
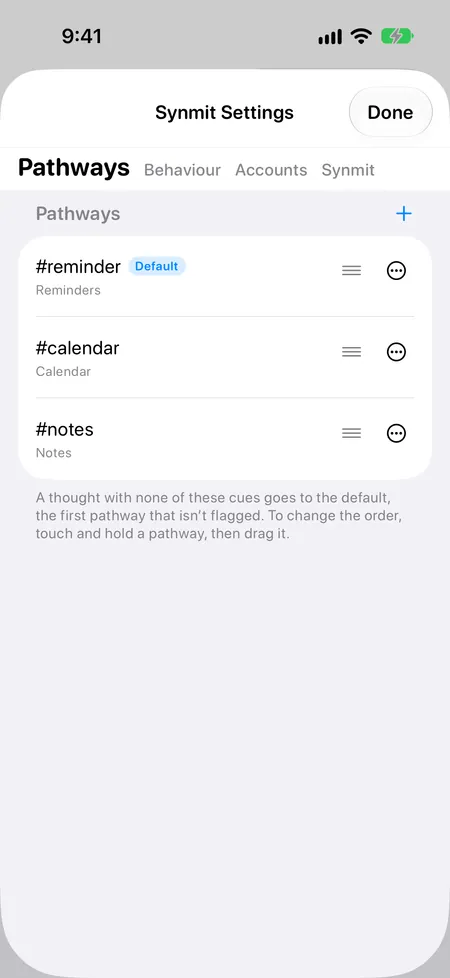
A pathway is a word that sends a thought somewhere. Synmit starts with three: #reminder, #calendar and #notes. Make your own for anywhere you send things often.
-
Open Pathways. Tap the gear, then Pathways.
-
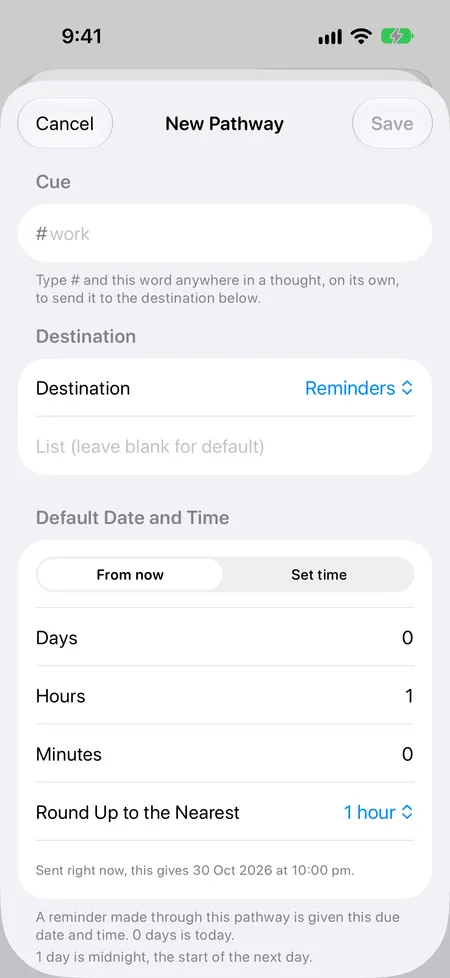
Add one. Tap +.
-
Choose its word. Under Cue, type the word, for example
groceries. “Type # and this word anywhere in a thought, on its own, to send it to the destination below.”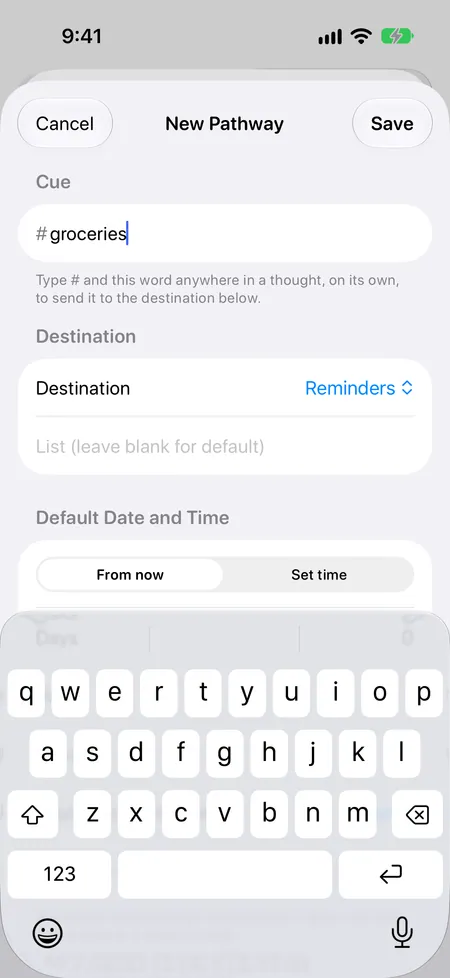
-
Choose where it goes. Tap Destination and pick one.
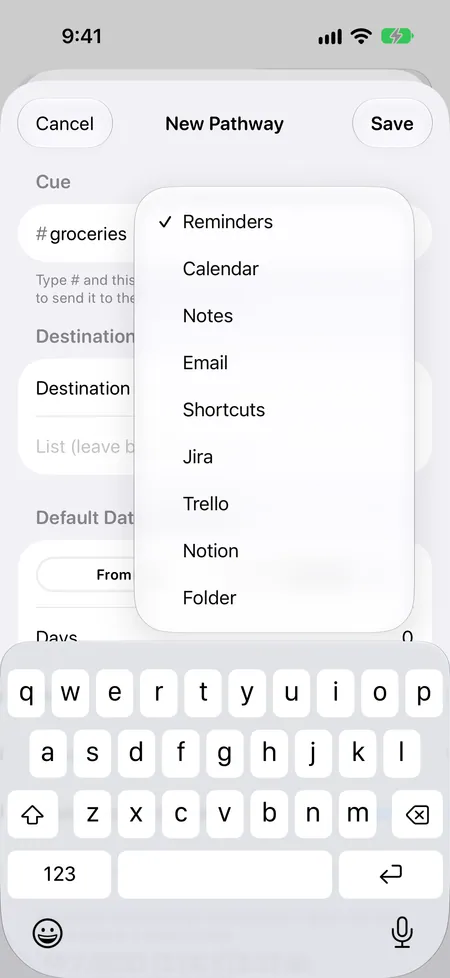
Reminders, Calendar and Notes are free. Email, Shortcuts, Jira, Trello, Notion and Folder come with Synmit Reach: “With Synmit Reach, your thoughts reach your own tools: your email, your own shortcuts, and the apps you sign in to.”
-
For Reminders and Calendar, set when. Default Date and Time gives what it makes a due date; the sheet shows the result, in a line that begins “Sent right now, this gives” and ends with the date and time.
-
Tap Save. Now
#groceriesin any thought sends it there.


Change one. Tap its •••, then Edit, and Edit Pathway opens.

Change the default. “A thought with none of these cues goes to the default, the first pathway that isn’t flagged. To change the order, touch and hold a pathway, then drag it.”
Connect your email, Jira, Trello or Notion
These come with Synmit Reach: “With Synmit Reach, your thoughts reach your own tools: your email, your own shortcuts, and the apps you sign in to.” Without it, each Add row carries a line such as “Synmit Reach connects to your Jira.” Tap it to see Synmit Reach and its free week.


Connecting is two steps: add the account, then give it a pathway, the word that sends thoughts there.
Add the account. Tap the gear, then Accounts.

-
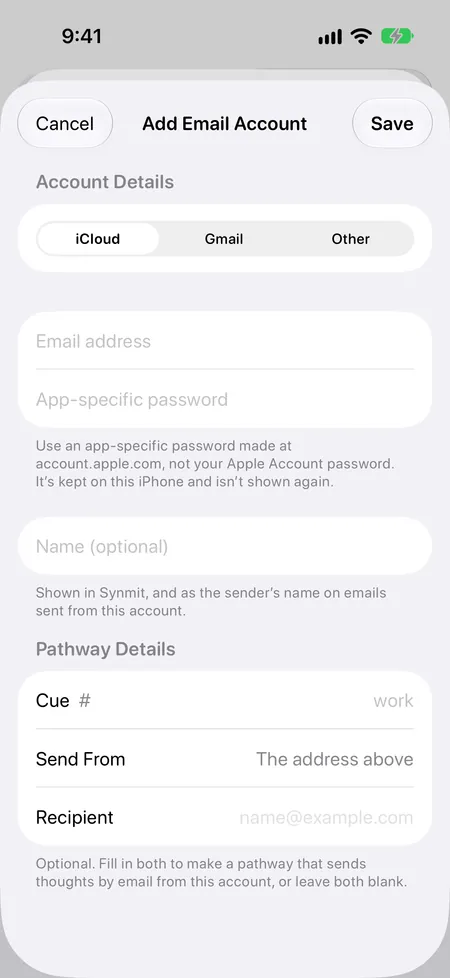
Email: tap Add Email Account, choose iCloud, Gmail or Other, then your address and an app-specific password: “Use an app-specific password made at account.apple.com, not your Apple Account password.” Fill in Cue and Recipient to make its pathway in the same go. “Synmit checks a new account by sending a test message to its own address before saving, and keeps its password on this iPhone.”
-
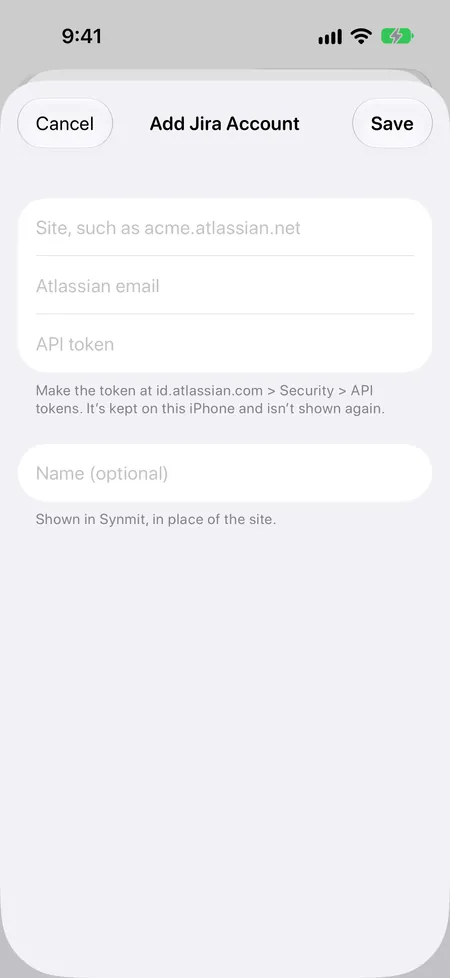
Jira: tap Add Jira Account and enter your site, your Atlassian email and an API token. “Make the token at id.atlassian.com > Security > API tokens.”
-
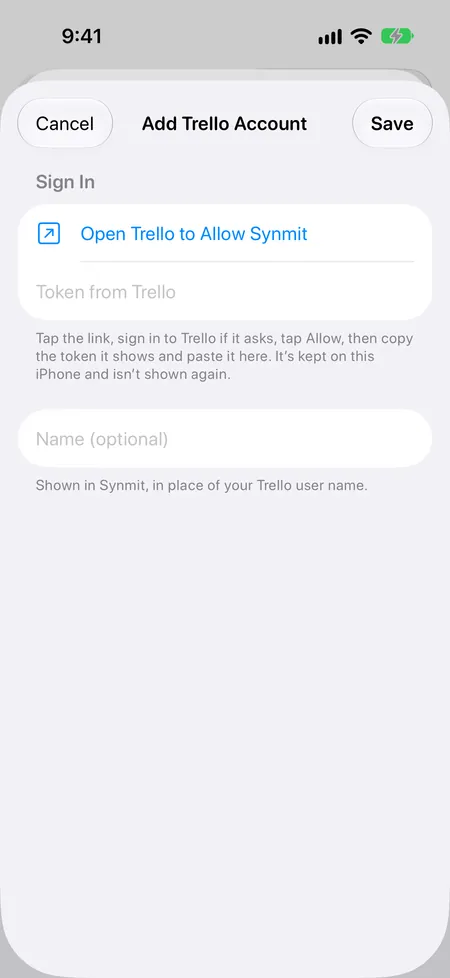
Trello: tap Add Trello Account, then Open Trello to Allow Synmit. “Tap the link, sign in to Trello if it asks, tap Allow, then copy the token it shows and paste it here.”
-
Notion: tap Add Notion Account, then Make a Connection in Notion. Copy its token and paste it here, then share the pages you want thoughts to go under, “from a page’s ••• menu > Connections.”
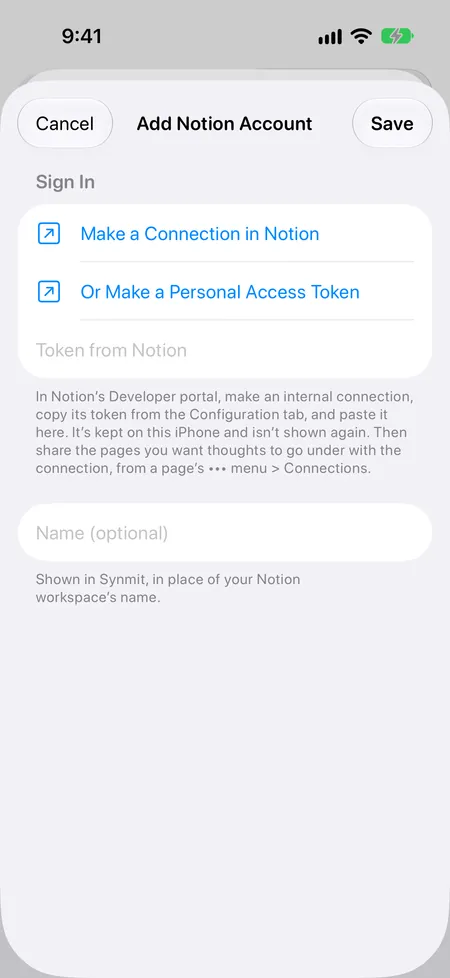


Tap Save. Synmit checks the account before saving it, and keeps the password or token on this device only.
Give it a pathway. Open the account and tap Add a Pathway. New Pathway opens with the account already chosen. Type its word, for example
work, and tap Save.

For Jira: “Thoughts sent through this pathway become issues in Jira, and can’t be
taken back from Synmit.” The account now lists it, and #work in any thought sends it there.
